AI Assistant
Table of Contents
- Prerequisites & Installation
- Staff Permissions
- API Configuration (Gemini API Key)
- Menu and Navigation Layout
- Upload Client
- Upload Expense
- Upload Invoice
- Document History & File Management
- Frequently Asked Questions (FAQ) & Troubleshooting
1. Prerequisites & Installation
Before you start using the module, please complete the following basic setup steps:
- Ensure that your Perfex CRM system is up and running smoothly.
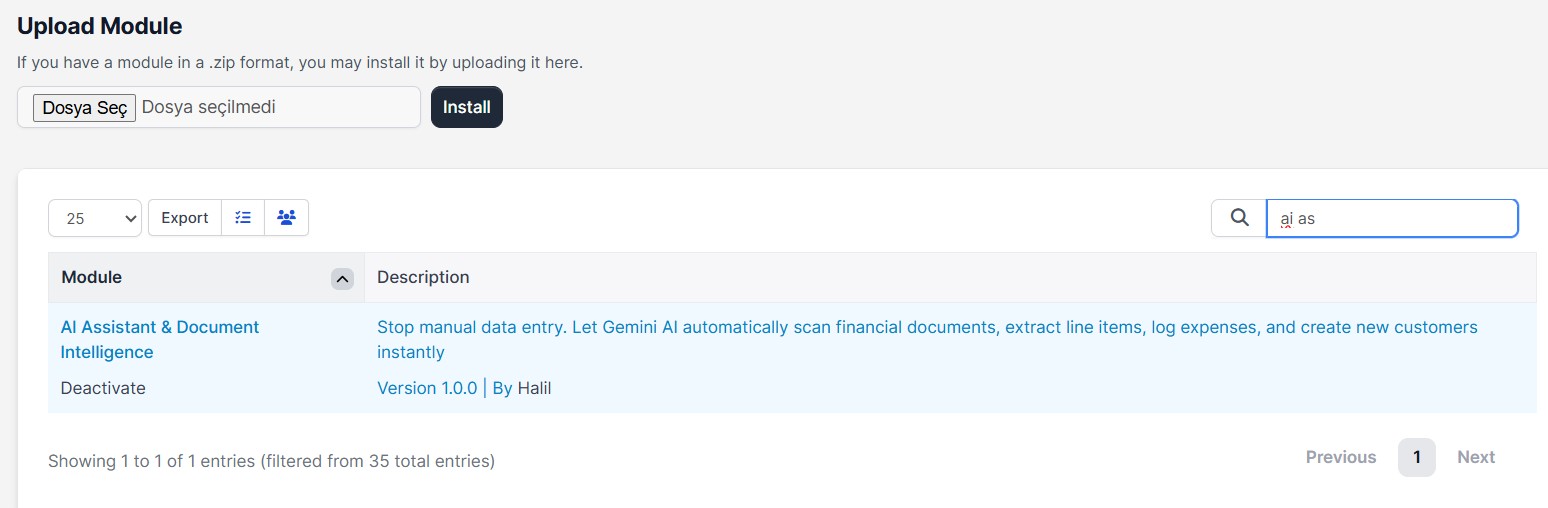
- Upload the module files into the
modules/directory of your server. - Navigate to the Modules page in your Perfex CRM Admin Panel and click activate.
2. Staff Permissions
Once the module is activated, you must grand permissions to your team members so they can access the AI Assistant panels. Go to Setup -> Staff, select the respective staff member, and enable the module permissions.

3. API Configuration (Gemini API Key)
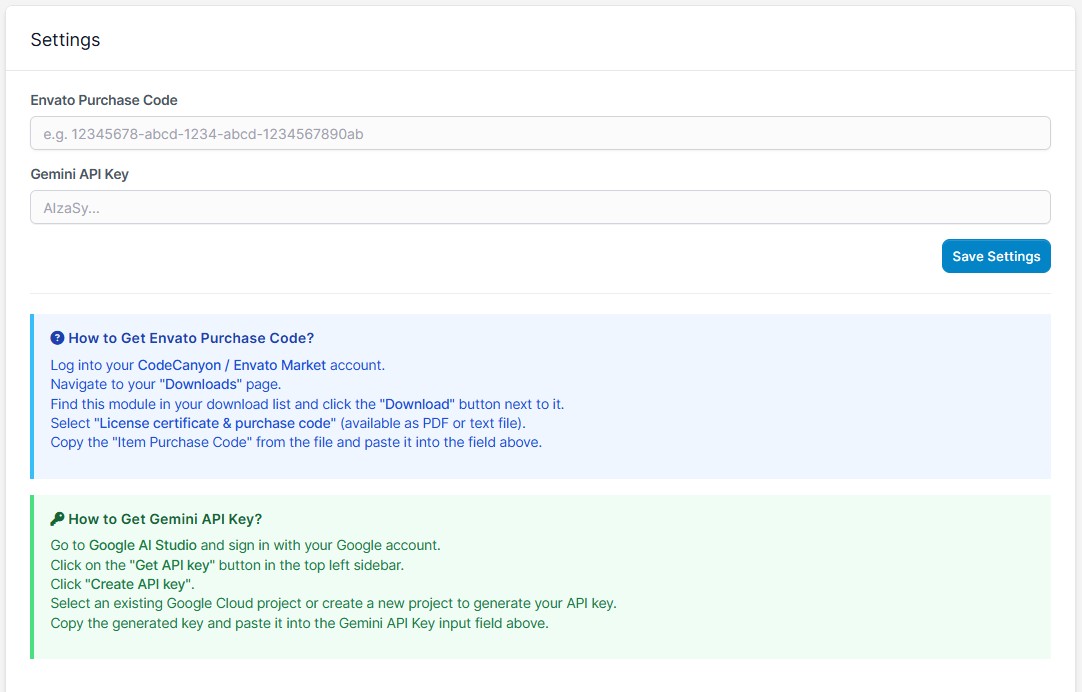
To run the AI features, you need your own Gemini API key. Setting up this structure is incredibly straightforward, allowing you to avoid forced monthly subscription fees and pay only for what you actually use:
- Obtain a Gemini API Key via Google AI Studio (using either the free tier or the pay-as-you-go model).
- Go to AI Assistant -> Settings from the Perfex CRM sidebar menu.
- Paste your key into the
Gemini Api Keyfield and save your changes.
4. Menu and Navigation Layout
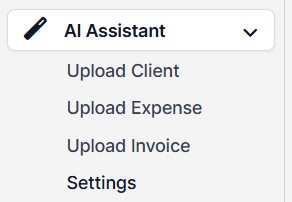
Once the installation and API setup are complete, the following distinct sub-pages will become available under the main AI Assistant menu section:
- Upload Client: A dedicated page specifically designed for scanning customer data/business cards, displaying its own independent document history.
- Upload Expense: A standalone interface dedicated entirely to processing expense receipts and tracking expense scan history.
- Upload Invoice: A separate page structured solely for uploading supplier invoices and auditing invoice history records.
- Settings: The management dashboard where you configure your module purchase code and your Gemini API Key.
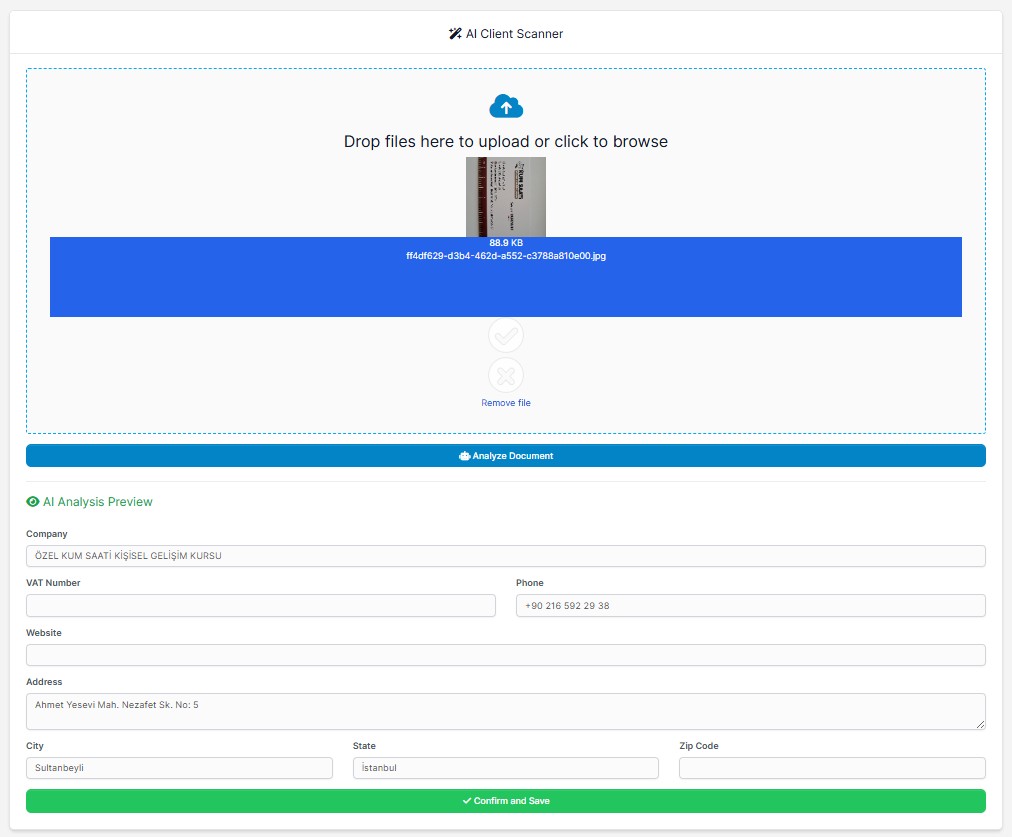
5. Upload Client
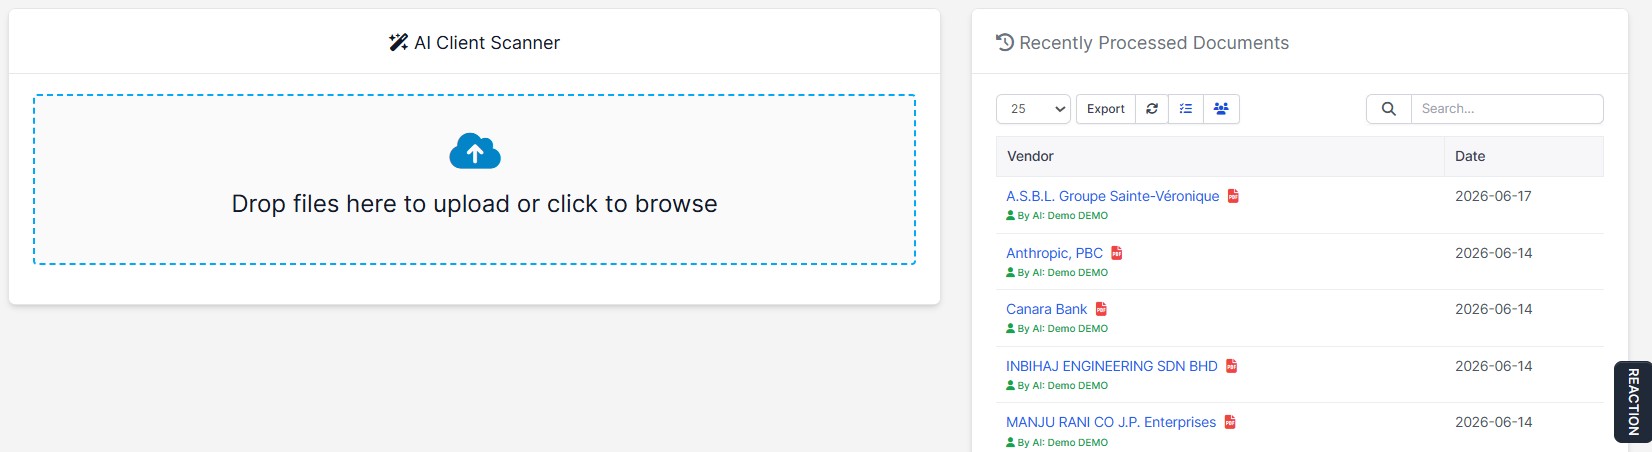
Navigate to the Upload Client page to automatically extract and create a customer card from business cards or info sheets:
- Drag and drop or select your customer document into the upload section on the left side of the page.
- Immediately after the upload, the AI scans the document and auto-populates all captured details (Company Name, Phone, Website, Address, etc.) directly into the form fields below the upload area—no pop-up modals required.
- Review the parsed data in the inline preview fields and click the Confirm and Save button to instantly create the customer profile.
- The completed entry is immediately logged in the Customer Document History list on the right side of the page.
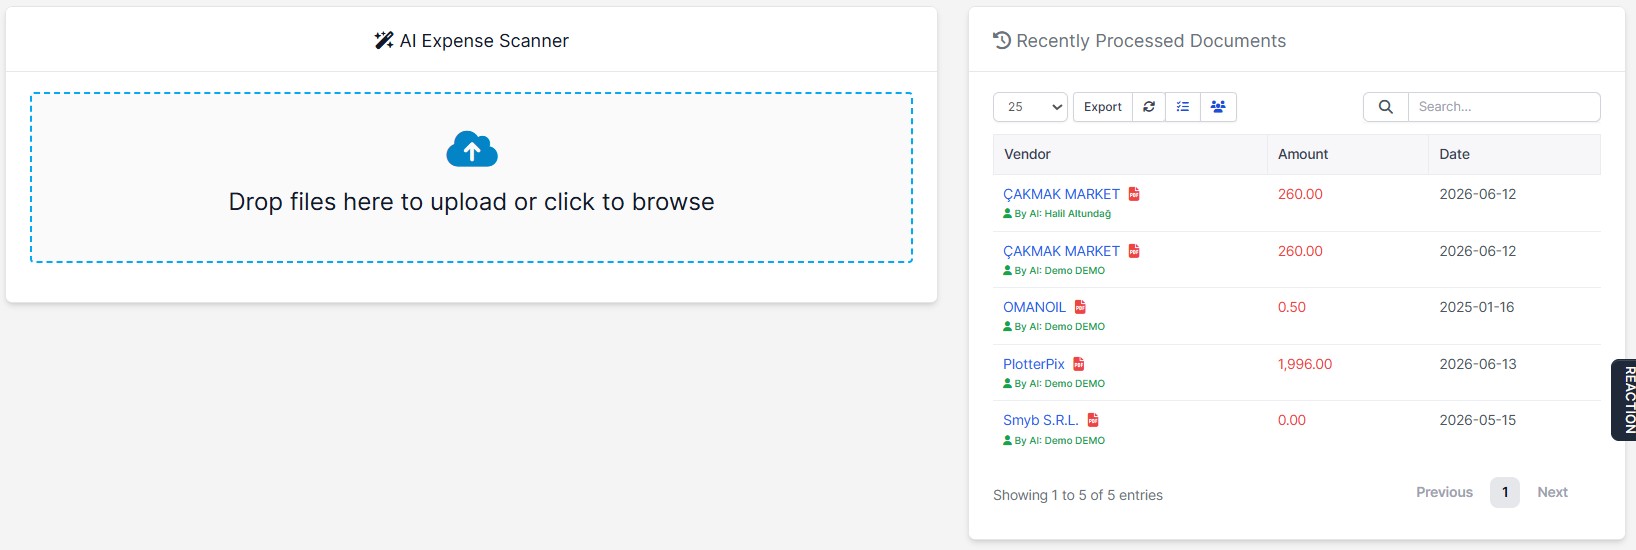
6. Upload Expense
To swiftly log company receipts and expenses without manual typing, go to the Upload Expense page:
- Upload your receipt or expense file via the drag-and-drop zone.
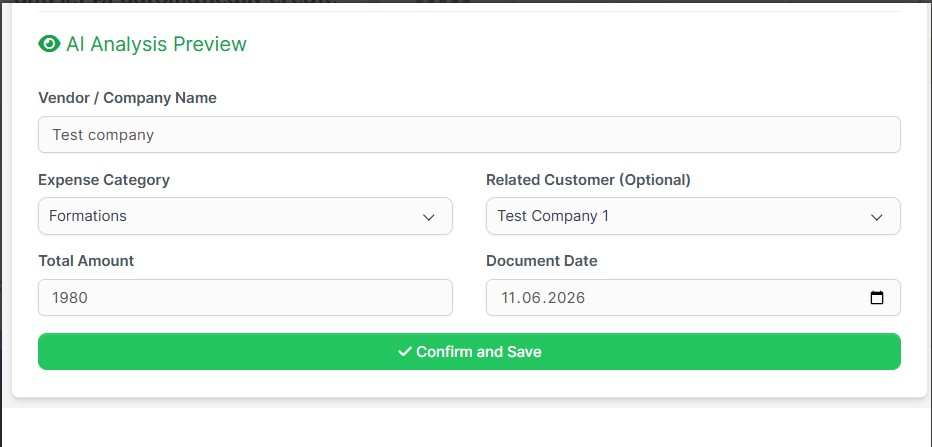
- The AI instantly analyzes the file to capture crucial financial data such as Vendor/Company Name, Expense Category, Total Amount, and Date, displaying them in the preview form fields right below the upload area.
- Optionally select a Related Customer to link this specific expense record to a client.
- Approve the generated form data, and the expense record is permanently saved into your Perfex CRM.
- The original uploaded document is instantly listed in the Expense History archive on the right side of the page.
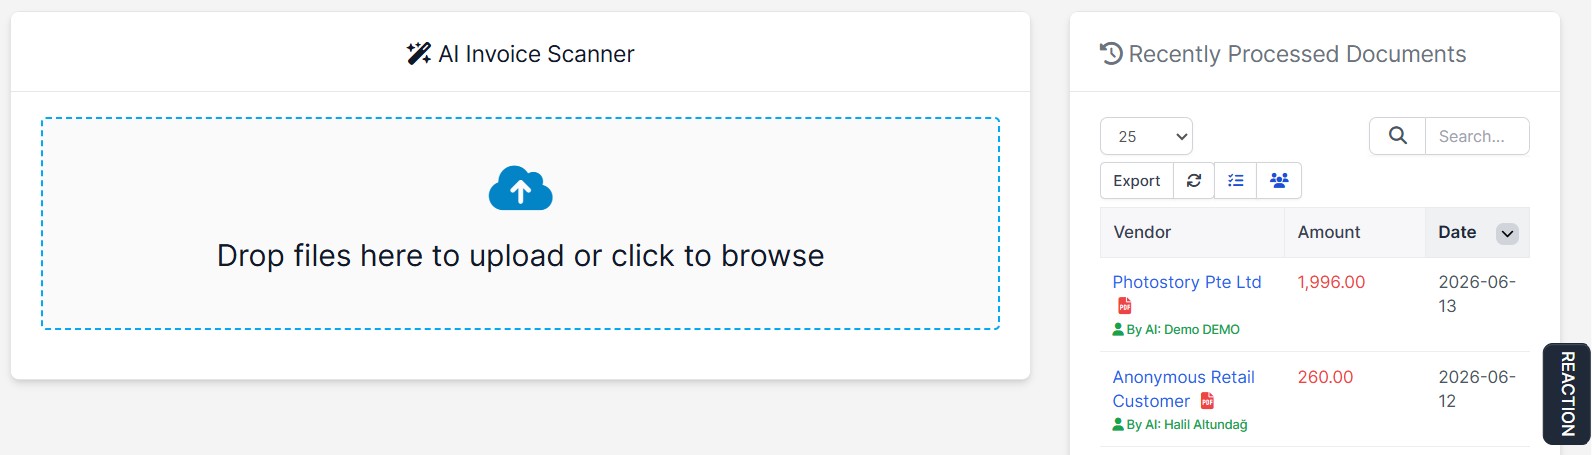
7. Upload Invoice
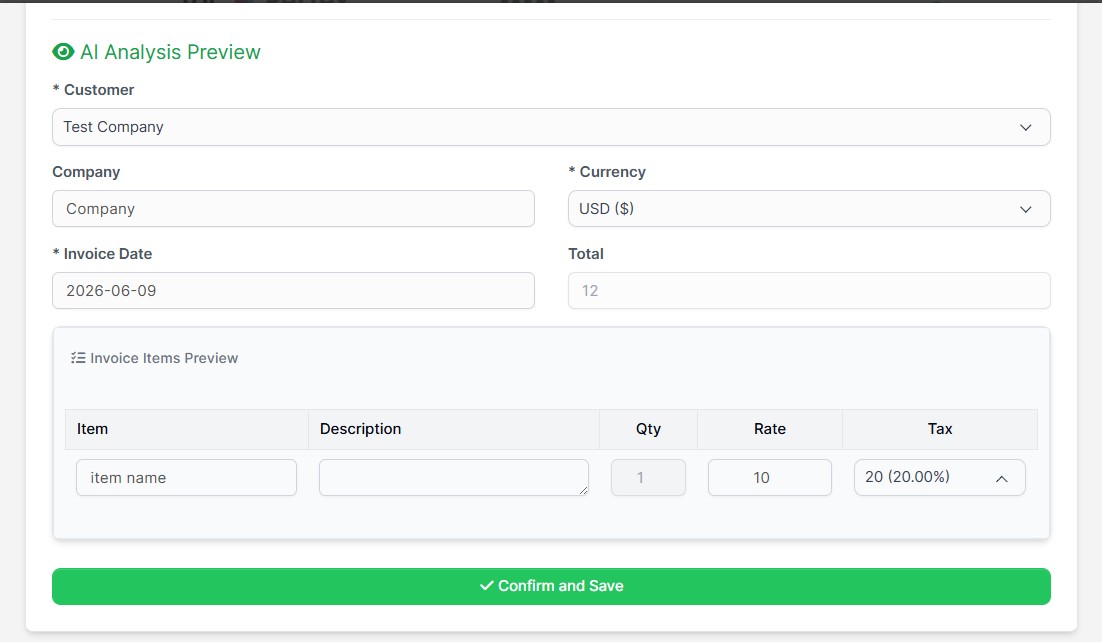
Instead of manually rewriting incoming vendor bills line-by-line, navigate to the Upload Invoice page to auto-generate structured drafts:
- Drop your invoice file into the upload zone.
- The AI decodes complex financial datasets including Customer details, Invoice Number, Line Items, Tax Rates, Currency, and Total Amount, automatically filling the form fields mapped below the layout.
- Select or link the appropriate client within the preview form to approve and issue the draft invoice rapidly.
- The uploaded source file is systematically archived into the Invoice History table on the right section of the layout.
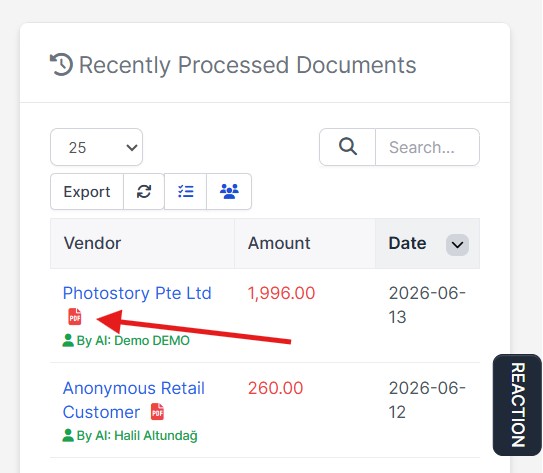
8. Document History & File Management
The "Recently Processed Documents" panel located on the right side of the Client, Expense, and Invoice pages operates as an independent, page-specific archive:
- Each page only filters and displays records, processing statuses, and upload timestamps belonging exclusively to that specific module category.
- Click the dedicated PDF / Image icon next to any history record to quickly view the original file directly in your system, allowing for fast audit cross-checks without downloading files.
9. Frequently Asked Questions (FAQ) & Troubleshooting
a) I am receiving an "AI engine timeout / Response delay" error
If you are testing the module on our shared public Demo server before making a purchase, this can occasionally happen due to high traffic volumes and shared API request limits. Once you buy the module and define your own **individual Gemini API Key**, your requests will go directly to Google servers, and processing will be completed instantly without interruptions.
b) The AI misses or misinterprets texts on certain documents
- Ensure that your uploaded image or PDF file is clear, highly legible, and captured under decent lighting conditions. Very blurry scans or complex handwritten notes might cause data gaps.
- Double-check that your Gemini API account status is active and that your billing or quota limitations are not exceeded.
Contact & Support
For any questions, custom feature requests, or documentation support regarding this module, feel free to get in touch with us:
- CodeCanyon Profile: halilaltndg
- Support Email: halilyazilim1@gmail.com