Email Template Manage
Table of Contents
- Prerequisites and Installation
- Staff Permissions
- Menu and Navigation Layout
- Template Management & Merge Fields
- Scheduled Email Timer (Mail Timer) & Logs
- Special Routine Emails
- Situational Reminders
- Automatic Triggers
- Smart Auto Reply Rules
- Scheduled Emails List
- Advanced Mailbox, Email Logs, System Templates & SMTP Settings
- Frequently Asked Questions (FAQ) & Troubleshooting
1. Prerequisites & Installation
Basic steps to take before you start using the module:
- Make sure your Perfex CRM system is working correctly without any issues.
- Upload the module files to the
modules/directory on your server. - Go to the Modules page in the Perfex CRM Admin Panel and activate the module.

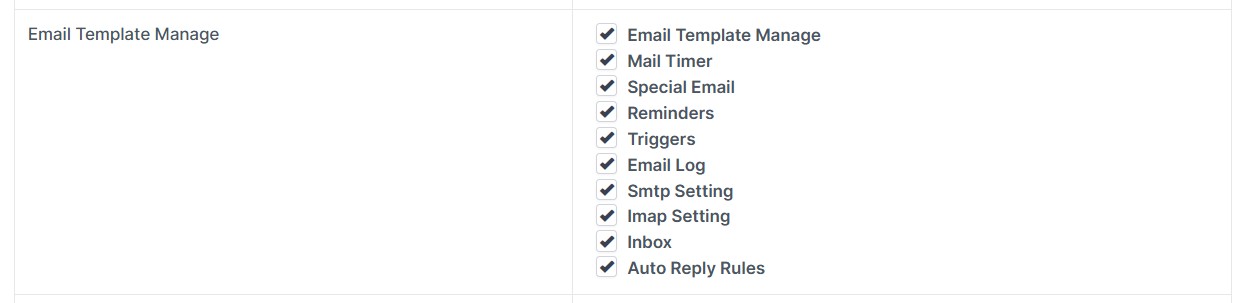
2. Staff Permissions
After activating the module, you must give permissions to your staff so they can manage email templates, triggers, and SMTP settings:
- Go to Settings → Staff and select the staff member.
- Check the permissions for this module and click save.
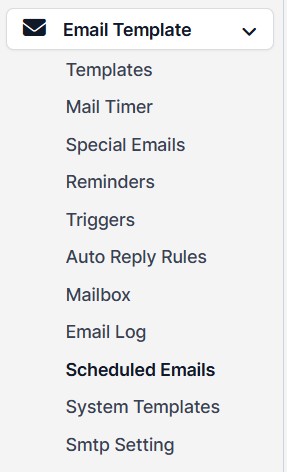
3. Menu and Navigation Layout
Once you set the permissions, a rich management menu will appear on the left admin sidebar. The menu includes these sections:
- Templates
- Quick Email Send / Mail Timer
- Special Emails
- Reminders
- Triggers
- Auto Reply Rules
- Mail Box
- Email Log
- Scheduled Emails
- System Templates
- SMTP Settings
4. Template Management & Merge Fields
Save time by creating email templates instead of typing the same content again and again. It is very easy to personalize templates with dynamic data:
- On the template creation screen, look at the "Available merge fields" section on the right side.
- For example, if you add {invoice_number} to the text area, the system will automatically put the correct invoice number when sending the email.
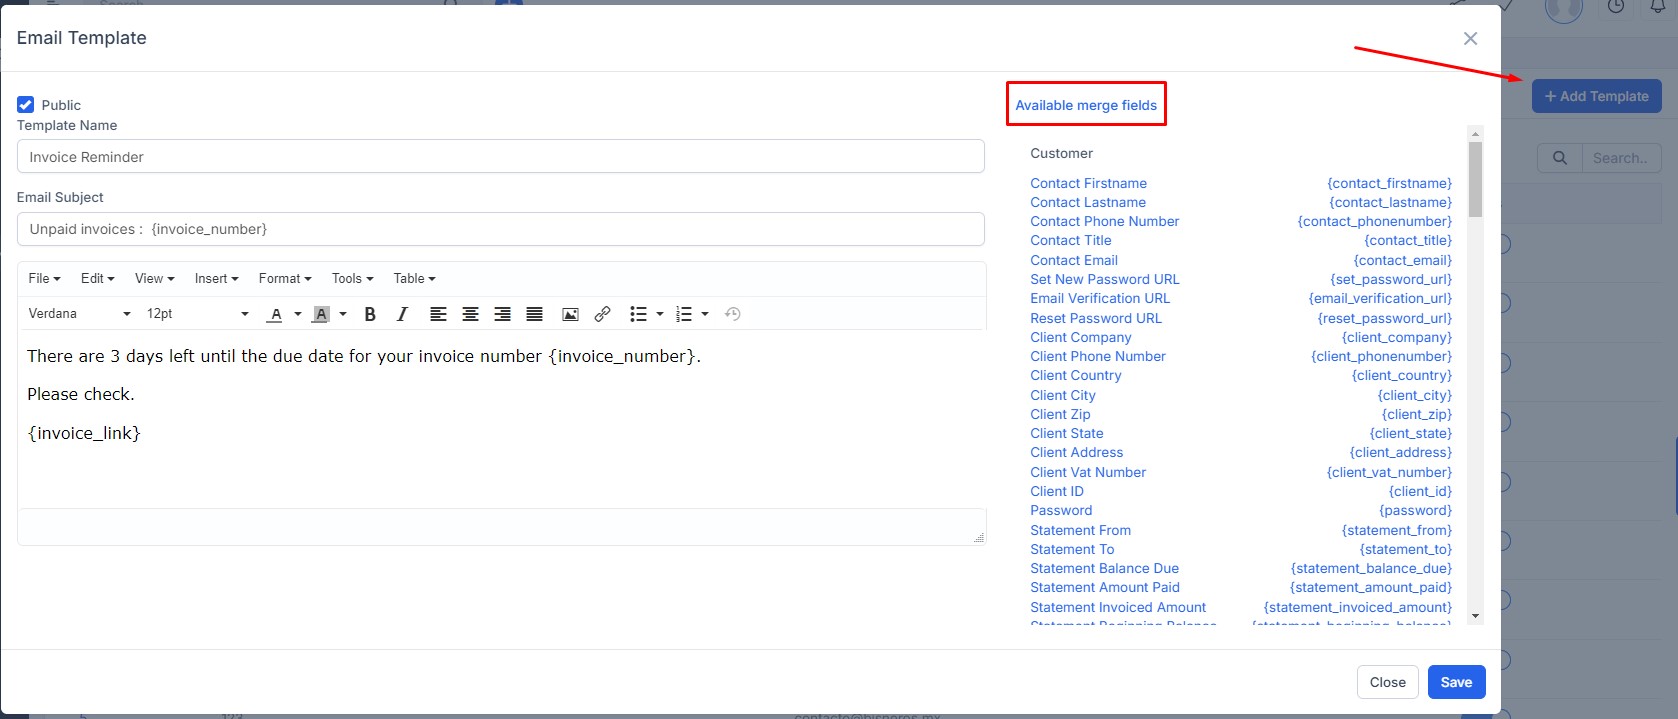
Use the "Attach File" feature to add permanent documents to your templates. Also, instead of writing similar templates from scratch, you can click the "Duplicate" button to clone a template in seconds and make quick changes.

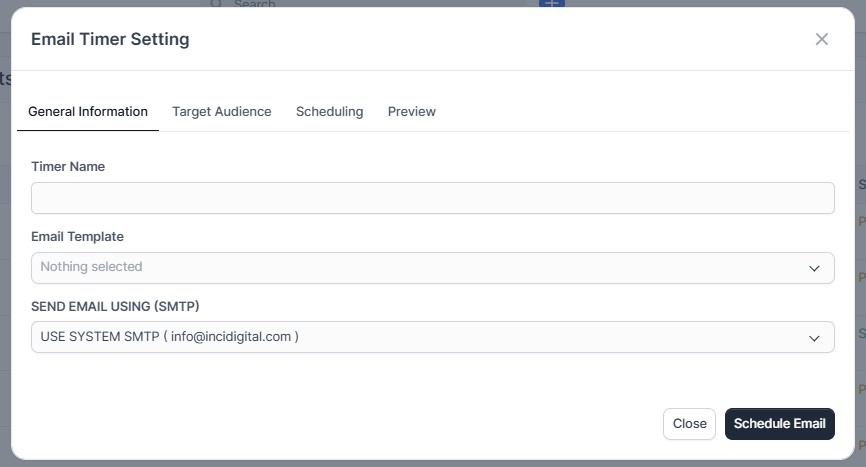
5. Scheduled Email Timer & Logs
The Mail Timer section lets you schedule your emails for a future date using advanced targeting options. Thanks to the updated setup wizard, you can complete the settings easily in 4 simple tabs:
In this first step, type a clear name for your timer rule in the Timer Name field. Next, select an Email Template that you created before. Finally, choose which email account (Send Email Using SMTP) the system should use to send these emails.
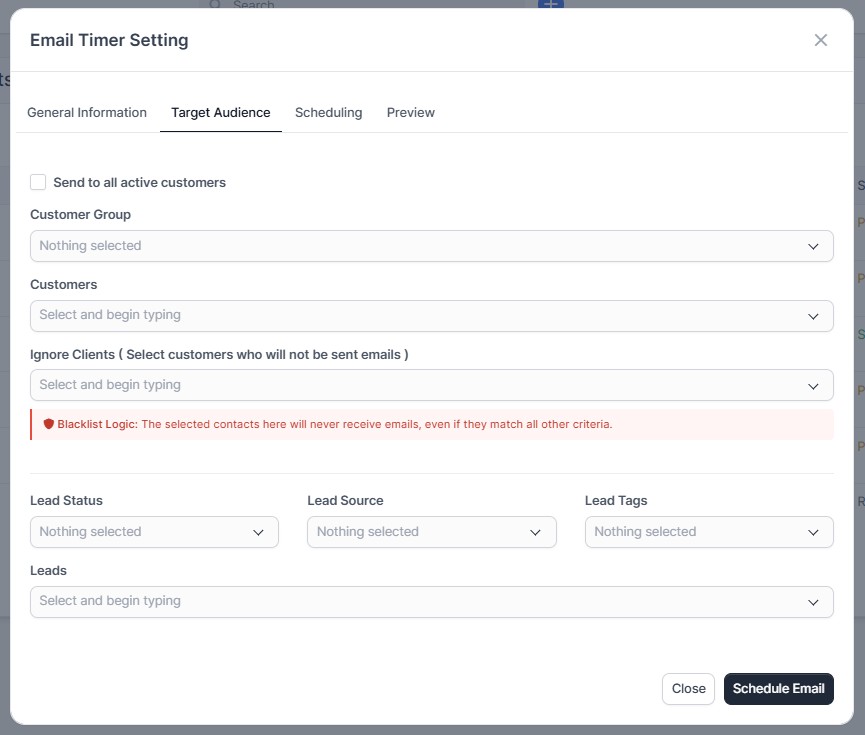
Choose exactly who will receive the email using advanced and precise filters:
- Active Customers: You can select the
Send to all active customerscheckbox to target everyone quickly. You can also filter by specificCustomer Groupsor select specificCustomersmanually. - Blacklist Logic: Any clients you select in the
Ignore Clientsfield will never receive emails from this timer, even if they match all other criteria. This prevents sending mistakes. - Lead Targeting: You can filter your potential customers by
Lead Status,Lead Source, andLead Tags, or select individual leads from the list manually.
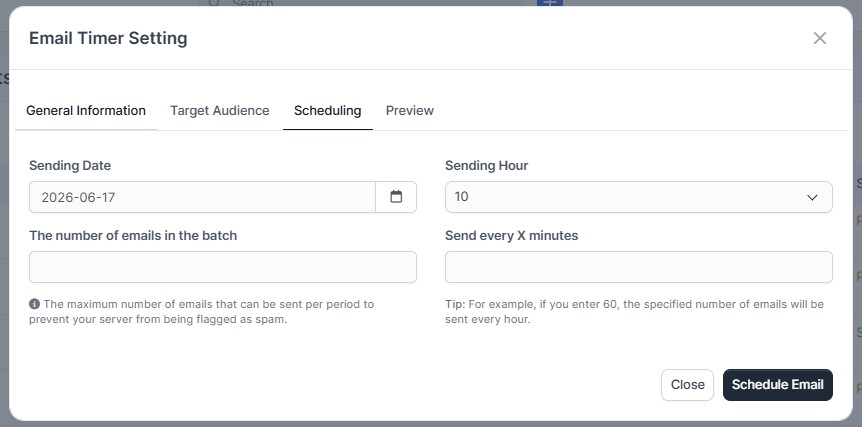
Manage the sending time and protect your server from being flagged as spam:
- Time Plan: Set the starting date (
Sending Date) and time (Sending Hour) for the emails. - Batch Sending Limit: Use the
The number of emails in the batchfield to limit how many emails are sent at one time. This stops your server from getting blocked for spam. - Frequency Option: Use the
Send every X minutesfield to choose how often a batch should be sent (For example: enter 60 to send the specified number of emails every hour).
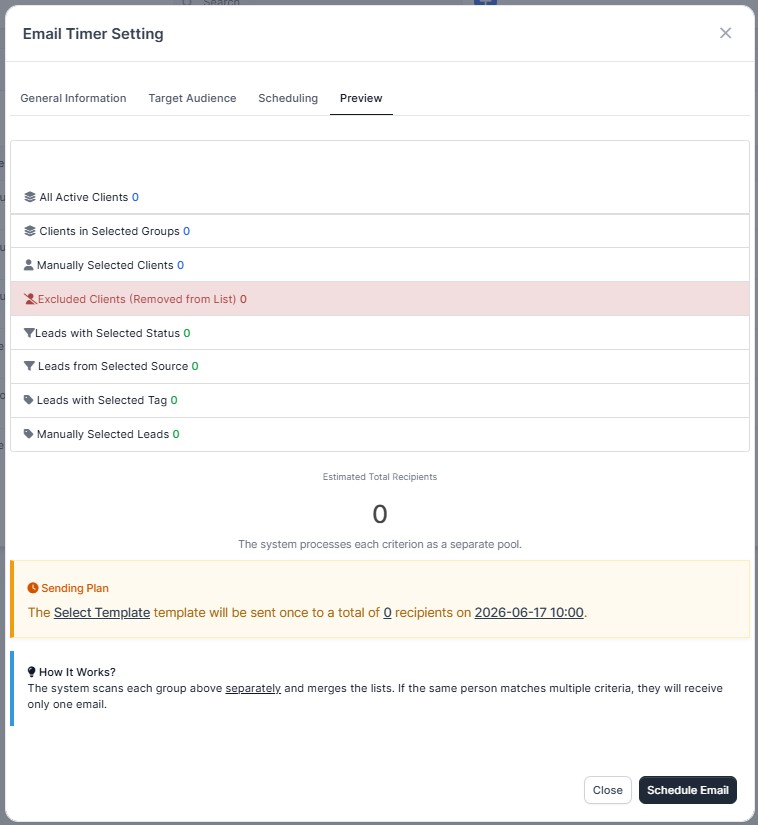
Before saving your rules, the system shows you a statistical summary of all your selected groups, leads, and clients.
You can track all sent or waiting emails from the main list using the buttons. You can click Send Now to send them immediately or click Duplicate to copy them easily.
To check the history of emails sent by the timer, click the "View Logs" button:

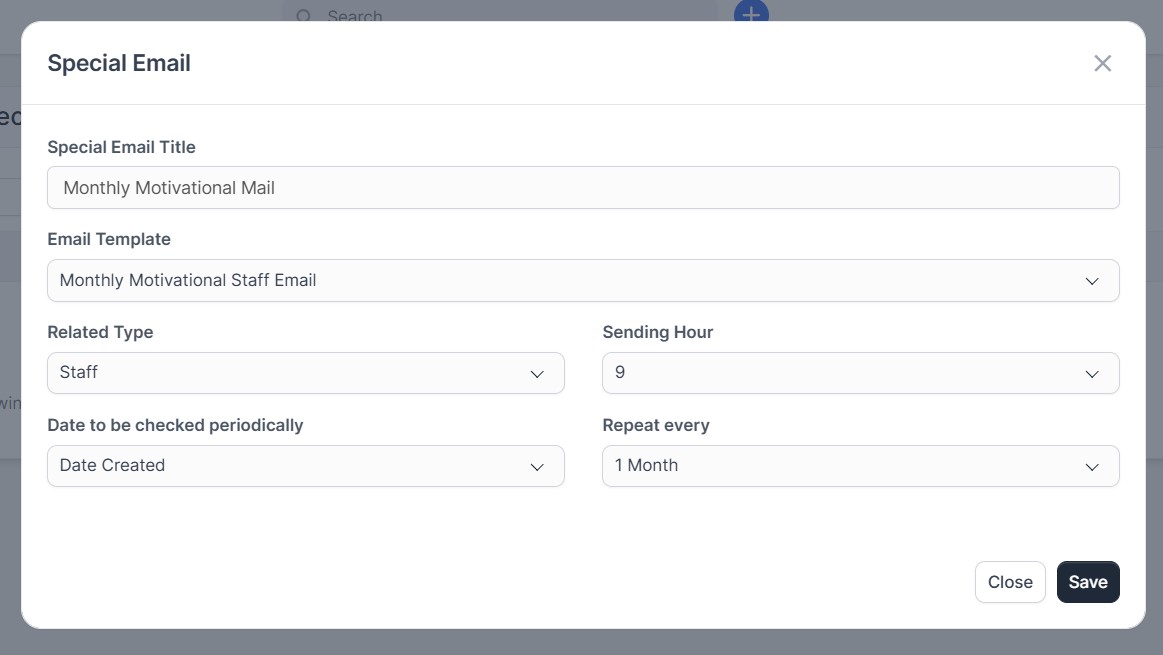
6. Special Emails
Create special emails that need to be sent to your customers or staff members regularly:
- Choose the sending time and how often it should repeat (Weekly, Monthly, etc.).
- Example Scenario: Create a monthly news template or a motivational email for your staff; the system will automatically send it to the whole team every month.
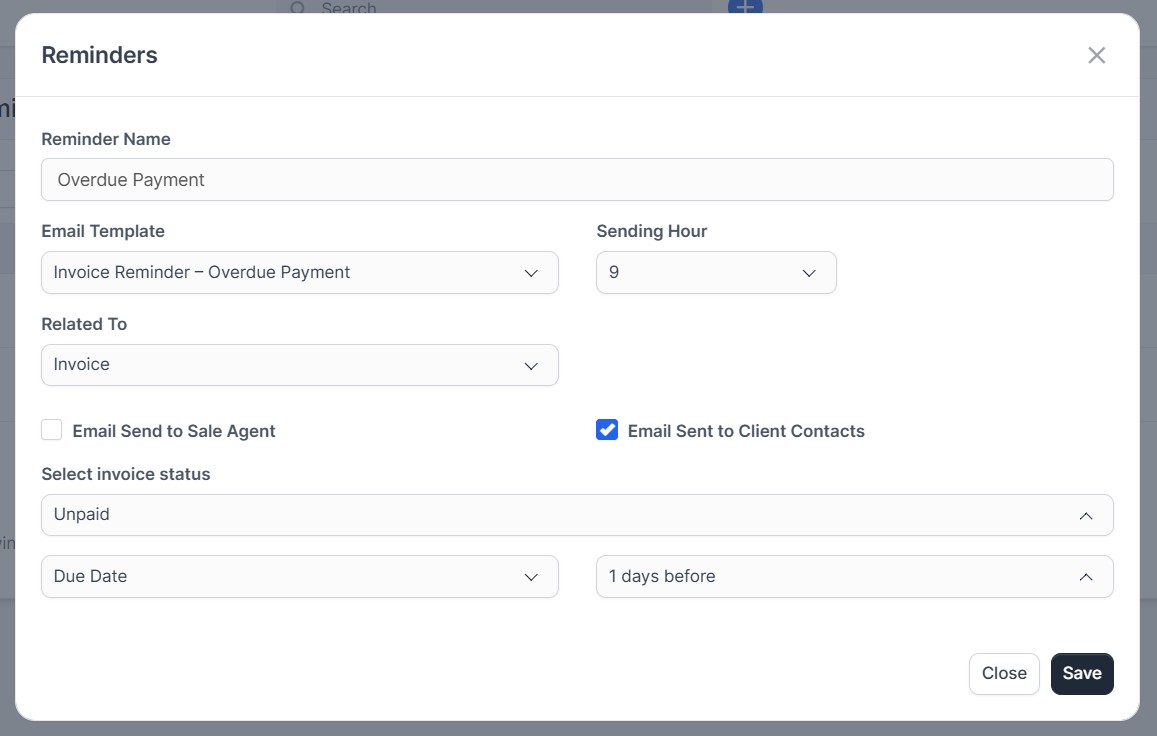
7. Reminders
Set up smart reminders based on dates and status for invoices, projects, proposals, tasks, contracts, and all other Perfex CRM items:
- Example: To track unpaid invoices automatically, set the system to send a polite reminder email to the customer 1 day before the due date.
- Example: Send a warning notification to both the responsible staff member and the client 5 days before a sent proposal expires.
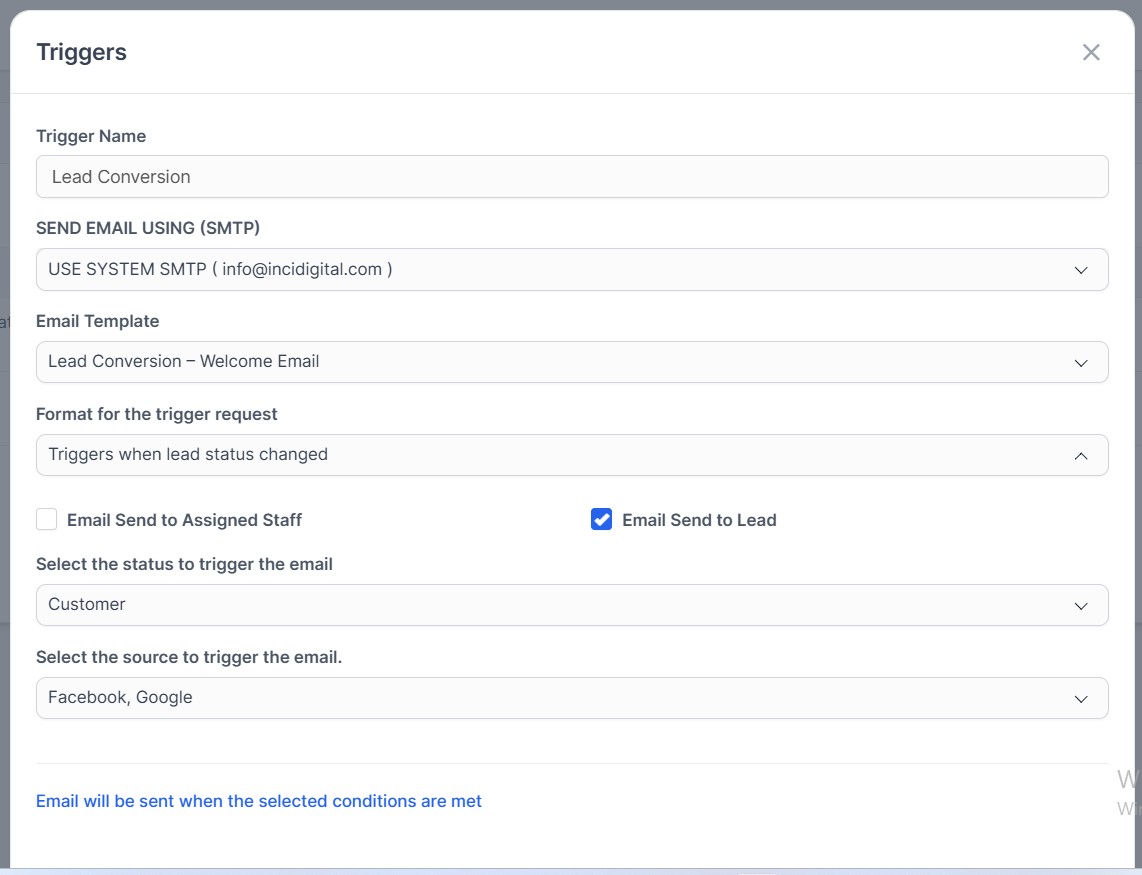
8. Automatic Triggers
You can create automation triggers that run instantly in the background when an action happens in the system. Supported trigger events:
- When a task is created, updated, or its status changes
- When a project status changes
- When an invoice is created or its status changes
- When an estimate is created
- When a proposal is created
- When a new lead is added or its status changes
- When a support ticket status changes
- When a task checklist item is marked as done
Customer Relations Tip: Create a trigger that runs the exact moment a lead changes to a "Customer" status. The system will instantly send a professional "Welcome" email to the new client to strengthen your business relationship from day one.
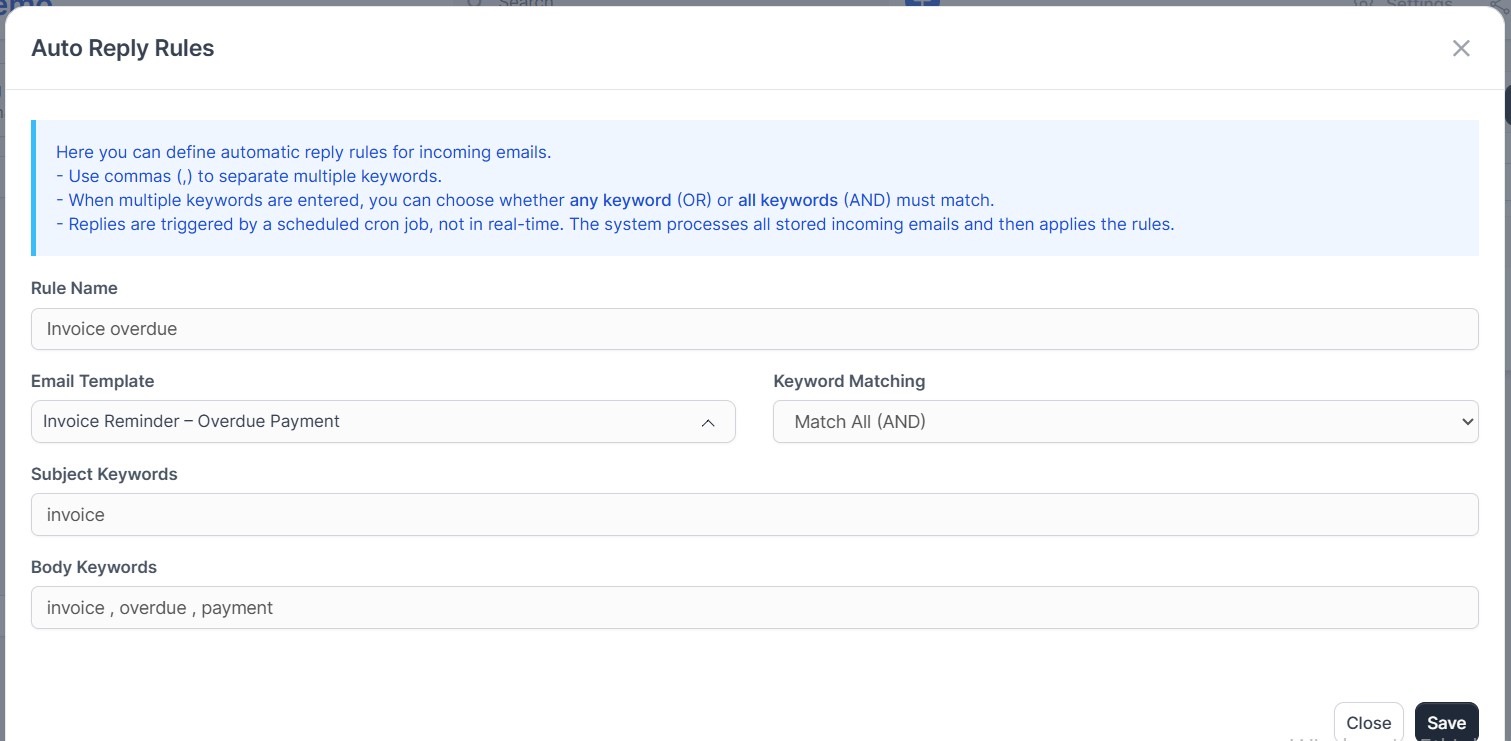
9. Smart Auto Reply Rules
Reply to incoming emails instantly without requiring your staff to log into the system:
- Choose the keywords you want the system to look for in incoming emails.
- Select whether the system should look for "all keywords" or "any keyword" to match the rule, then connect a reply template.
- When a rule matches, the system sends the automatic reply to keep customer satisfaction high.
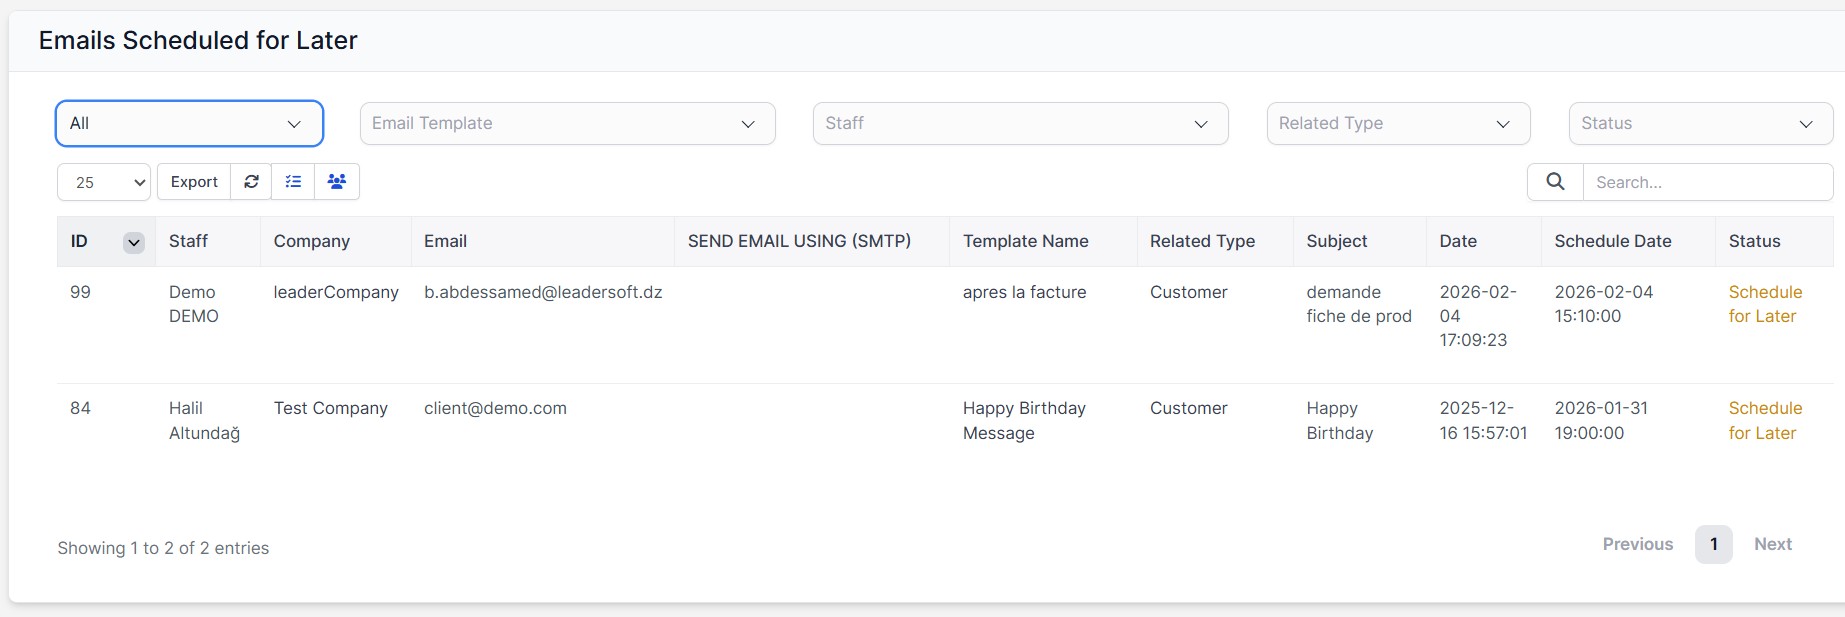
10. Emails Scheduled for Later
All individual emails waiting to be sent at a future date are stored in this central queue list. With this panel, you can track which email, which template, and which recipient are waiting, all from a single screen.
Advanced filtering and tracking features on this screen include:
- Advanced Filtering: Filter your scheduled emails easily by the
Email Templateused, theStaffwho planned it, theRelated Type(Customer, Lead, etc.), or the currentStatus. - Detailed Data Table: The list shows a unique ID for each entry, the staff member, the recipient company/client name, the recipient email address, the SMTP account to be used, the template name, the email
Subject, the creationDate, and the targetSchedule Date. - Status Tracking: Emails that are waiting and have not been sent yet are marked with a Schedule for Later badge in the table.
- Export Options: You can export this scheduled data to formats like Excel or CSV, or print it using the top buttons.
11. Advanced Mailbox, Email Logs, System Templates & SMTP Settings
Other integrated tools and settings that improve management quality:
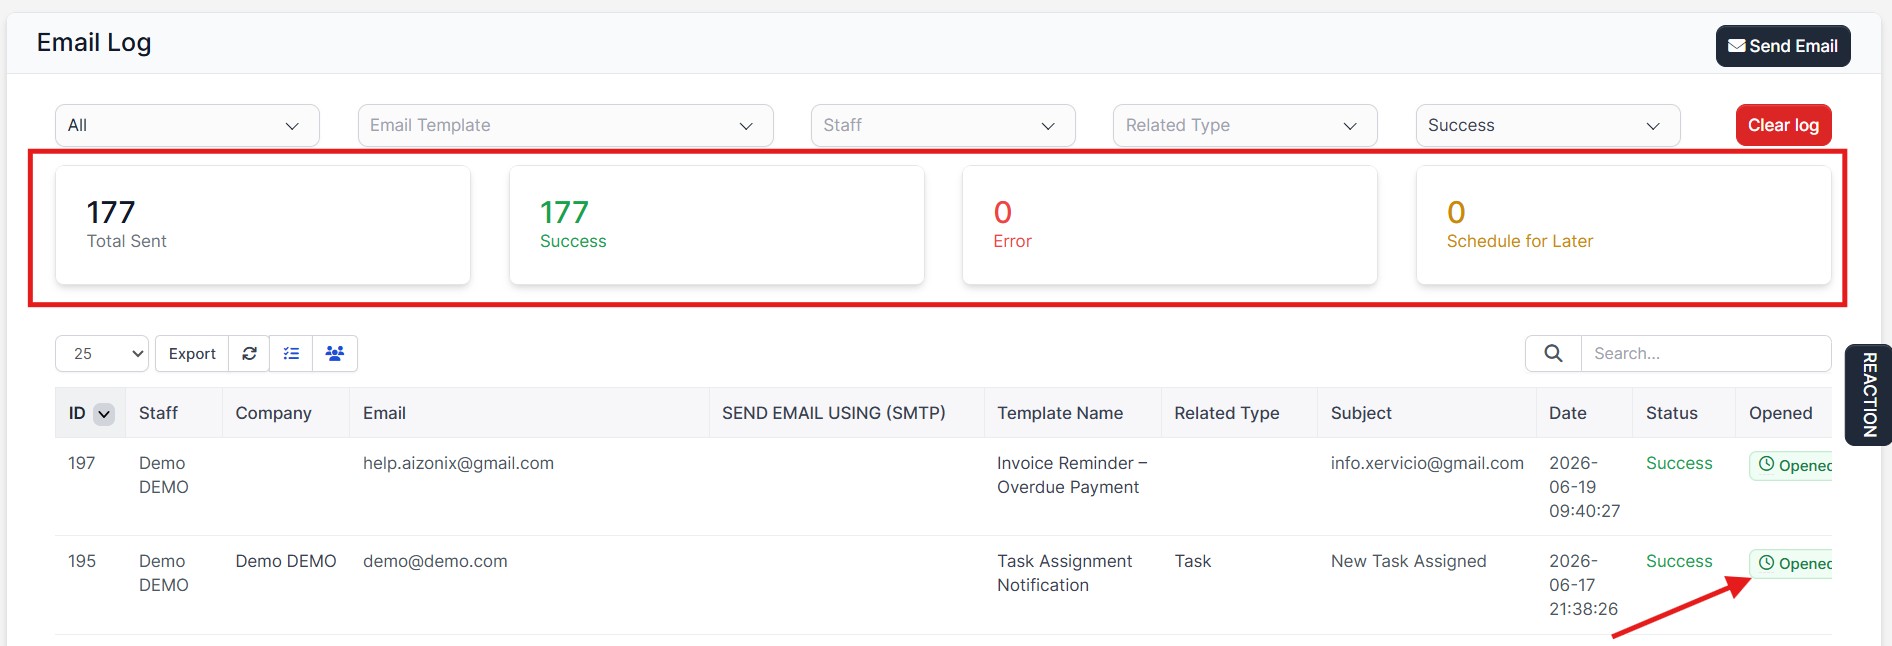
Analyze all your incoming and outgoing emails in detail. Knowing whether a very important email was opened by the recipient helps guide your business processes directly.
All outgoing emails from the system are listed here. You can look at the "Opened" column in the table to see if the customer read the email.
General information is at the top of the list.
Choose and filter which automated core emails from Perfex CRM should be tracked and logged by this module using this screen.

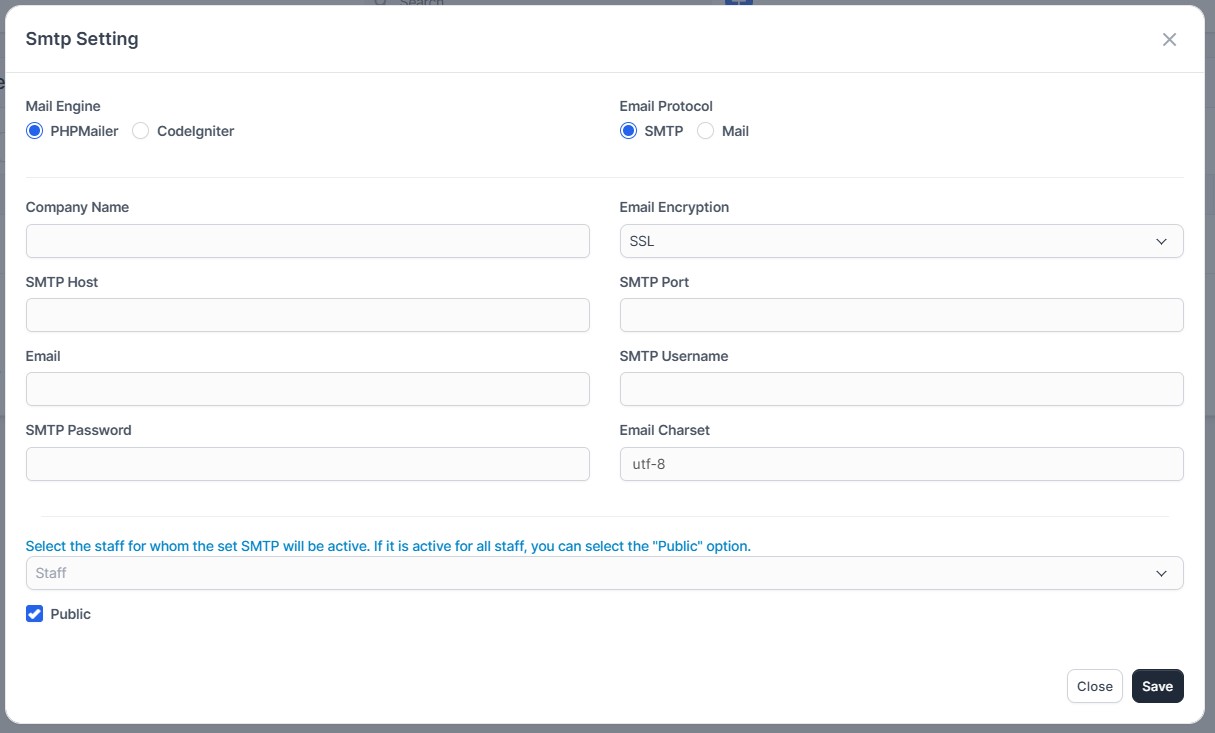
If your company has more than one email address or department (e.g., support@, sales@, accounting@), you can add them all as SMTP accounts here. You can then select these different addresses as sender emails on the Triggers page. You can also limit which staff members can use which SMTP account.
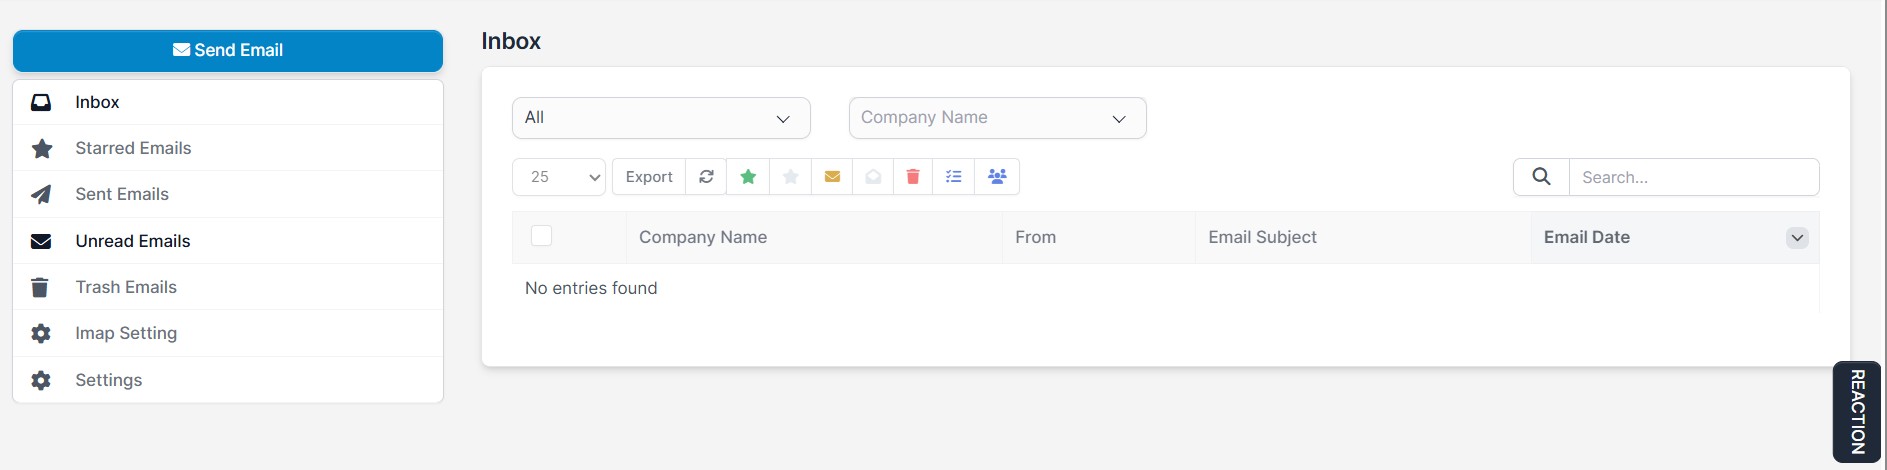
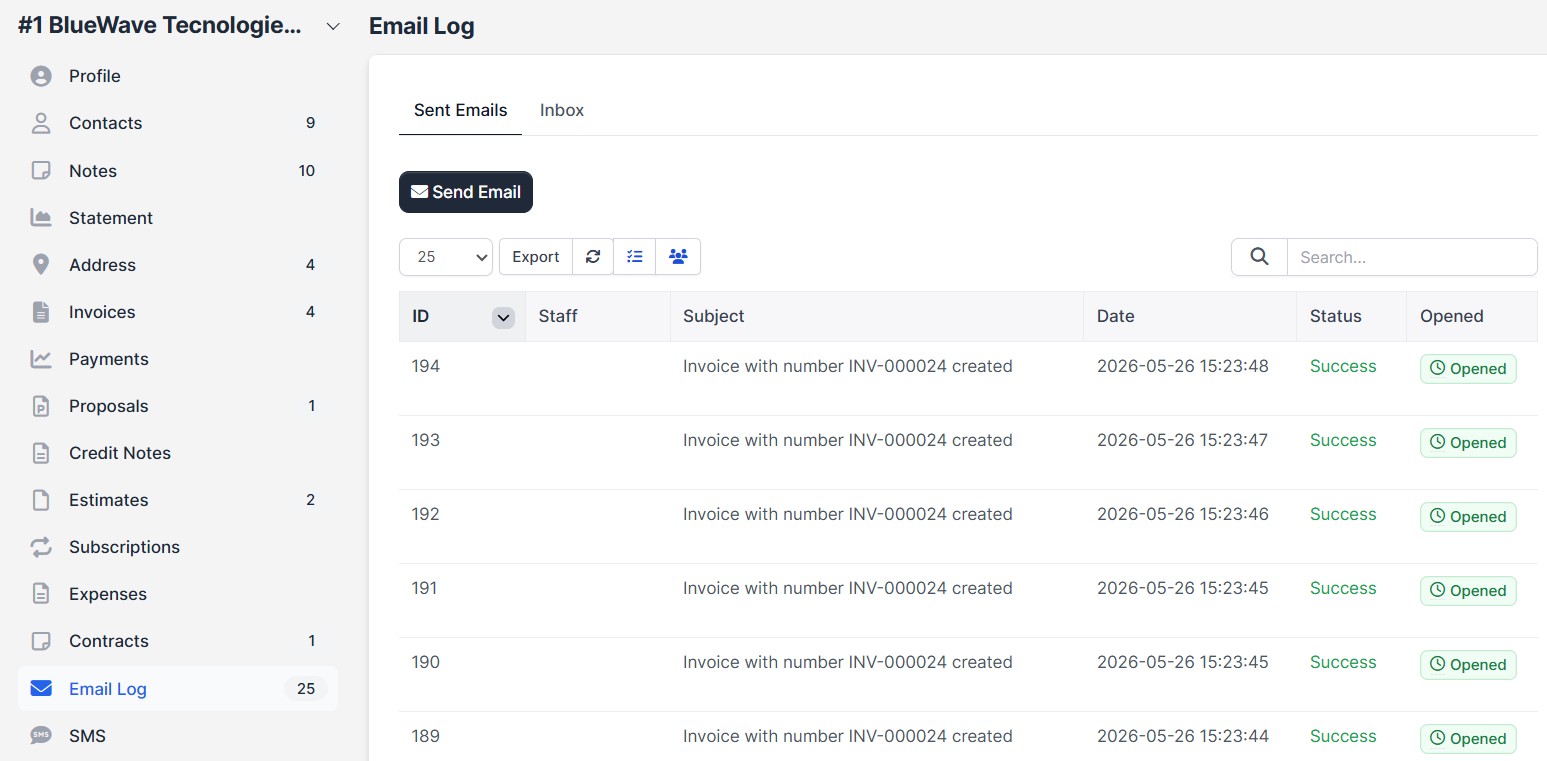
The module integrates directly into the standard Perfex CRM Customer Profile page. When you view a customer's card, a new "Email Log" tab appears on the left menu. This lets you manage all email traffic for that specific client without leaving their profile page.
This customer-specific panel features two main tabs:
- Sent Emails: A list of all emails sent to this customer by the system or staff. The table displays the sender
Staff, emailSubject, sendingDate, and deliveryStatus. You can also check theOpenedcolumn to see if the customer opened that specific email. - Inbox: Filter and view incoming emails sent from this customer to your company under this tab.
- Quick Email from Customer Card (Send Email): Click the
Send Emailbutton on this panel to open a window and send a new email using your module templates instantly, without leaving the client page.
12. Frequently Asked Questions (FAQ) & Troubleshooting
a) Emails are not sending / The Timer is not working
- Make sure the Perfex CRM Cron Job settings are working correctly on your server. Scheduled emails are sent via cron tasks.
- Check the email credentials, login info, and port numbers that you added in the SMTP Settings section.
- Check the
Email Logpage to view error messages in the sending history.
b) The "Opened" column is not updating
- The system adds an invisible tracking pixel to the email content to check if it was opened. If the recipient's email provider (like Outlook or Gmail) blocks images automatically, the status might not update even if the user opens the email.
- Make sure your system URL and image paths are public (open to the external world) and your SSL certificate (https) is valid.
c) The auto reply rule is not triggering
- Make sure the keywords in the incoming email match the exact words you defined in the rule.
- Check if you configured the rule type correctly (Must match all / Match any) and make sure the rule is turned on (active).
Appendix: Sample Workflow (Step-by-Step User Guide)
- Activate the module and set email management permissions for your staff members.
- Add your extra email accounts in the SMTP Settings page to use for different departments if needed.
- Prepare your templates in the Templates section using dynamic merge fields ({invoice_number}, {client_name}, etc.) for text you send often.
- Create a scheduled rule in the Mail Timer section for a future campaign or announcement by filtering your target audience (customer or lead groups).
- Go to the Triggers section to automate internal operations; for example, set up an automatic email that runs "When Invoice Status changes to Unpaid".
- Define Auto Reply Rules with critical keywords to provide immediate automated replies to incoming customer emails.
- After the process starts, visit the Mail Box and Email Log pages regularly to check outgoing email status and see if customers opened the emails (Opened).
Contact / Support
Feel free to contact us anytime for questions about the module, customization requests, or documentation support:
- CodeCanyon Profile: halilaltndg
- Support Email: halilyazilim1@gmail.com